
How to Install a Prehung Interior Door in 2026
Install a prehung interior door with a careful plan for measuring, handing, shimming, fastening, consistent reveals, casing, and final adjustment.
Affiliate disclosure: We may earn a commission on purchases made through links in this article, at no extra cost to you. Learn more.
A prehung door arrives attached to its jamb, which removes hinge mortising from the job but does not remove the need for accurate layout. The frame must sit plumb, square, and untwisted inside an opening that provides the correct finished-floor clearance.
This guide addresses a conventional, non-rated interior door in wood framing. Exterior, fire-rated, sound-rated, pocket, bifold, masonry, and commercial openings have different requirements. Do not alter a header or other framing until a qualified professional has confirmed whether it is structural.
Confirm the replacement before demolition
Measure the existing door slab, jamb width, wall thickness, and rough opening where accessible. Record the desired swing and handing from a consistent viewpoint, then verify the manufacturer's convention before ordering. Also account for the finished floor, rugs, transitions, and required ventilation clearance.
Inspect the new unit for shipping damage, a warped slab, loose hinges, and incorrect handing while it can still be returned. Keep shipping braces in place until the manufacturer's instructions say to remove them.
Prepare the opening safely
Score painted joints around the casing. Remove trim gradually with a protected pry bar, then detach the old jamb without damaging nearby drywall or flooring. Watch for wiring, plumbing, alarm cable, and other concealed services before cutting or driving fasteners.
Clear protruding nails and debris. Check the sill or finished floor for level, both sides of the opening for plumb, and the wall faces for twist. Measure at several points. Correct rot, moisture damage, loose framing, or an opening outside the door manufacturer's tolerances before installing the unit.
Dry-fit the door
Place the unit in the opening with help; a solid-core assembly can be awkward and heavy. Confirm that the jamb sits at the correct depth for the finished wall and that casing will lie flat on both faces. Verify floor clearance without removing more material than the door instructions permit.
If the floor is out of level, the jamb legs may need unequal trimming so the head remains level. Mark deliberately and recheck the swing direction before cutting.
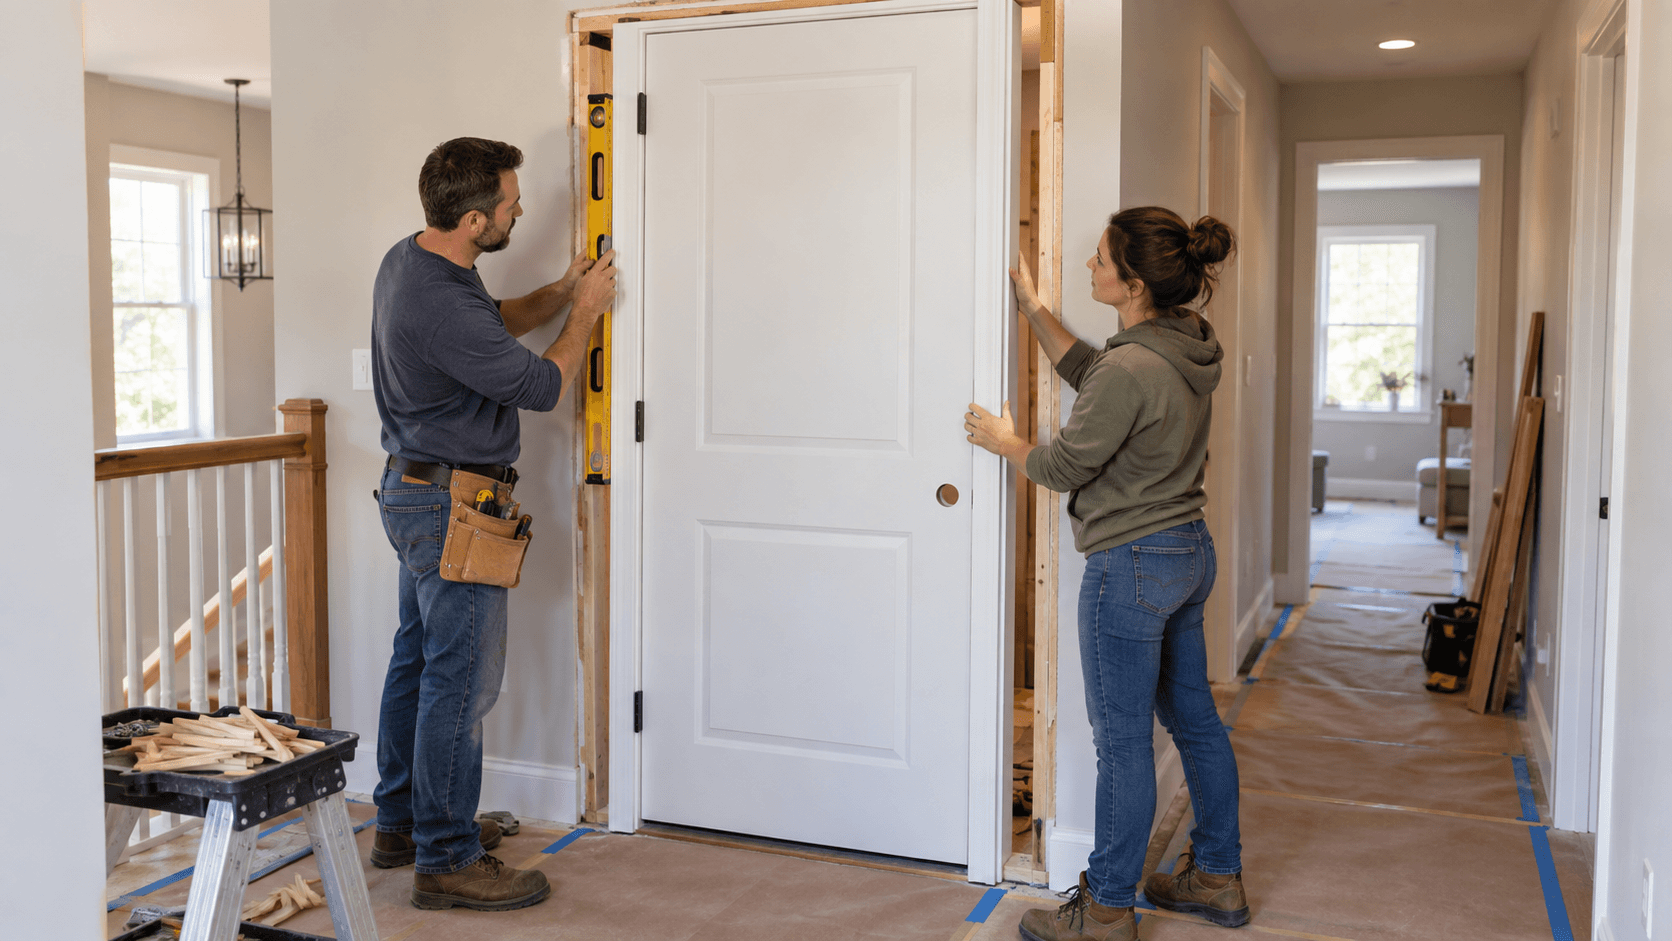
Set the hinge jamb plumb
Position shims behind the upper, middle, and lower hinge locations rather than bending an unsupported jamb toward the framing. Use a long level to check the hinge jamb in both directions. Fasten provisionally through the shim locations using the method and fasteners specified for the door.
Do not assume finish nails alone are suitable for every unit. A heavy solid-core door, specialty assembly, or manufacturer warranty may require screws in specific locations. Avoid overtightening: drawing a fastener too far can bow the jamb.
Establish the reveal
Close the door gently and inspect the gap between slab and jamb. Adjust the head jamb and latch jamb until the reveal is consistent and the slab does not contact the frame. Shim near the strike and other instructed fastening points, then secure the frame incrementally.
Check operation after each group of fasteners. The door should remain where it is placed instead of swinging open or closed by itself, the latch should meet the strike without lifting or pushing the slab, and both faces should align with their stops.
Finish the gap and trim
If air or sound sealing is part of the design, use only materials compatible with the door system. When permitted, low-expansion window-and-door foam must be applied sparingly so it cannot distort the jamb. Do not substitute foam for required shims or mechanical fasteners.
Reinstall or cut casing only after the frame operates correctly. Keep an even setback from the jamb edge, locate safe fastening points, and test-fit miters before fastening. Fill nail holes, use paintable caulk only at appropriate trim-to-wall gaps, and prime or paint according to the door and coating instructions.
Install the hardware and make final adjustments
Fit the lockset and strike using the hardware template. Do not enlarge the strike opening aggressively to compensate for a frame that is out of square. If the latch misses, diagnose the reveal, hinge fasteners, and shim pressure first.
Cycle the door several times and confirm that:
- The slab clears the finished floor through its full swing.
- The gaps at the top and sides remain visually even.
- Hinge screws are seated without stripping.
- The latch enters and releases cleanly.
- The casing is secure and does not pull the jamb out of alignment.
Common mistakes
- Ordering by the old slab size without checking the complete opening and jamb depth.
- Reversing handing or overlooking a light switch behind the new swing.
- Fastening the latch jamb before the hinge jamb is plumb.
- Placing shims away from hinges and other load points.
- Driving fasteners until the jamb bows.
- Using general expanding foam that presses the frame inward.
- Hiding an operating problem with casing instead of correcting the frame.
Sources
Frequently Asked Questions
How much larger should the rough opening be than a prehung door?
Do you install the hinge side or latch side first?
Can expanding foam be used around a door frame?
About the author
Jane DIY
— Senior Reviews EditorJane DIY is the Senior Reviews Editor for DIY Tool Guide. Her byline identifies articles she reviews for clarity, sourcing, and practical usefulness.
More from Home Renovation
How to Install Baseboards in 2026: Measure, Cut, Cope, and Finish
Install baseboards with a practical plan for material acclimation, stud layout, inside and outside corners, scarf joints, fastening, caulk, and paint.
How to Install Floating Laminate Flooring in 2026
Plan and install a floating laminate floor with product-specific acclimation, flatness, moisture, underlayment, expansion gaps, layout, and transition details.
How to Recaulk a Bathtub in 2026: Remove, Prepare, and Seal
Recaulk a bathtub by diagnosing the joint, removing old sealant, cleaning and drying compatible surfaces, applying a controlled bead, and allowing full cure time.