
How to Install Landscape Edging in 2026
Install landscape edging with a planned line, product-specific trench, secure connections, correct staking, finished grade, and safer transitions.
Affiliate disclosure: We may earn a commission on purchases made through links in this article, at no extra cost to you. Learn more.
Landscape edging can define a bed and slow the migration of turf or mulch, but it cannot correct poor drainage, unstable soil, or an unsuitable paver base. The right installation starts by defining what the edge must do.
This guide focuses on flexible lawn-and-bed edging. Steel, aluminum, plastic, concrete, stone, timber, and paver-restraint products use different trench, connector, cutting, and staking details. Keep the instructions supplied with the selected system on site.
Plan the boundary
Mark the proposed line with a hose or marking paint approved for the site. View it from the house, street, and normal walking routes. Smooth broad curves usually look intentional and are easier to mow than small repeated waves.
Check for drainage paths, downspouts, irrigation tubing, lighting cable, tree roots, property boundaries, and access points. Complete the required utility-location process before digging or driving stakes. Do not sever major roots to force a decorative curve.
Select an edging system
Match the material to the environment and maintenance plan:
- Flexible metal: creates a narrow visual line and smooth curves, but cut ends and connectors must be safely finished.
- Plastic roll or composite: easy to curve, but temperature movement and stake design vary widely.
- Timber: visually substantial but requires suitable wood, corrosion-compatible fasteners, and a plan for eventual decay.
- Concrete or stone: durable when supported correctly, though more excavation and base preparation may be required.
- Paver restraint: part of a pavement assembly, not a substitute for decorative edging chosen by appearance.
Measure the actual run and add the overlap or connector allowance specified by the manufacturer. Count supplied stakes rather than assuming a universal spacing.
Establish finished grade
The top of edging must be high enough to contain material but not so high that it becomes a trip or mower hazard. For example, Permaloc's instructions for specific aluminum landscape products call for setting the top about 1/2 inch above compacted finish grade. That dimension belongs to those systems; use the chosen product's detail.
Set a string for straight runs. For curves, mark reference points and keep the line flowing. Identify where the edge meets pavement, a wall, another section, or an open end so every transition has a deliberate finish.
Cut the trench
Wear eye protection, gloves, and footwear suited to digging. Use a sharp spade to cut along the layout and remove only the soil needed for the system. Keep excavated soil off the lawn where possible.
Make the trench consistently deep enough for the edging and its required finished height. Remove rocks that would twist the section. Do not use a hammer to force thin edging through unknown obstructions.
Fit sections and connectors
Lay several sections loosely before final staking. Use only the manufacturer's connectors and orient them as shown. A joint that looks acceptable from above may separate after freeze-thaw movement if the connector is not fully engaged.
Cut material with the recommended tool. Deburr metal cuts and fit an approved end treatment. For formed corners, follow the system's notching or bending method instead of crushing the top bead with repeated hammer blows.
Stake and adjust
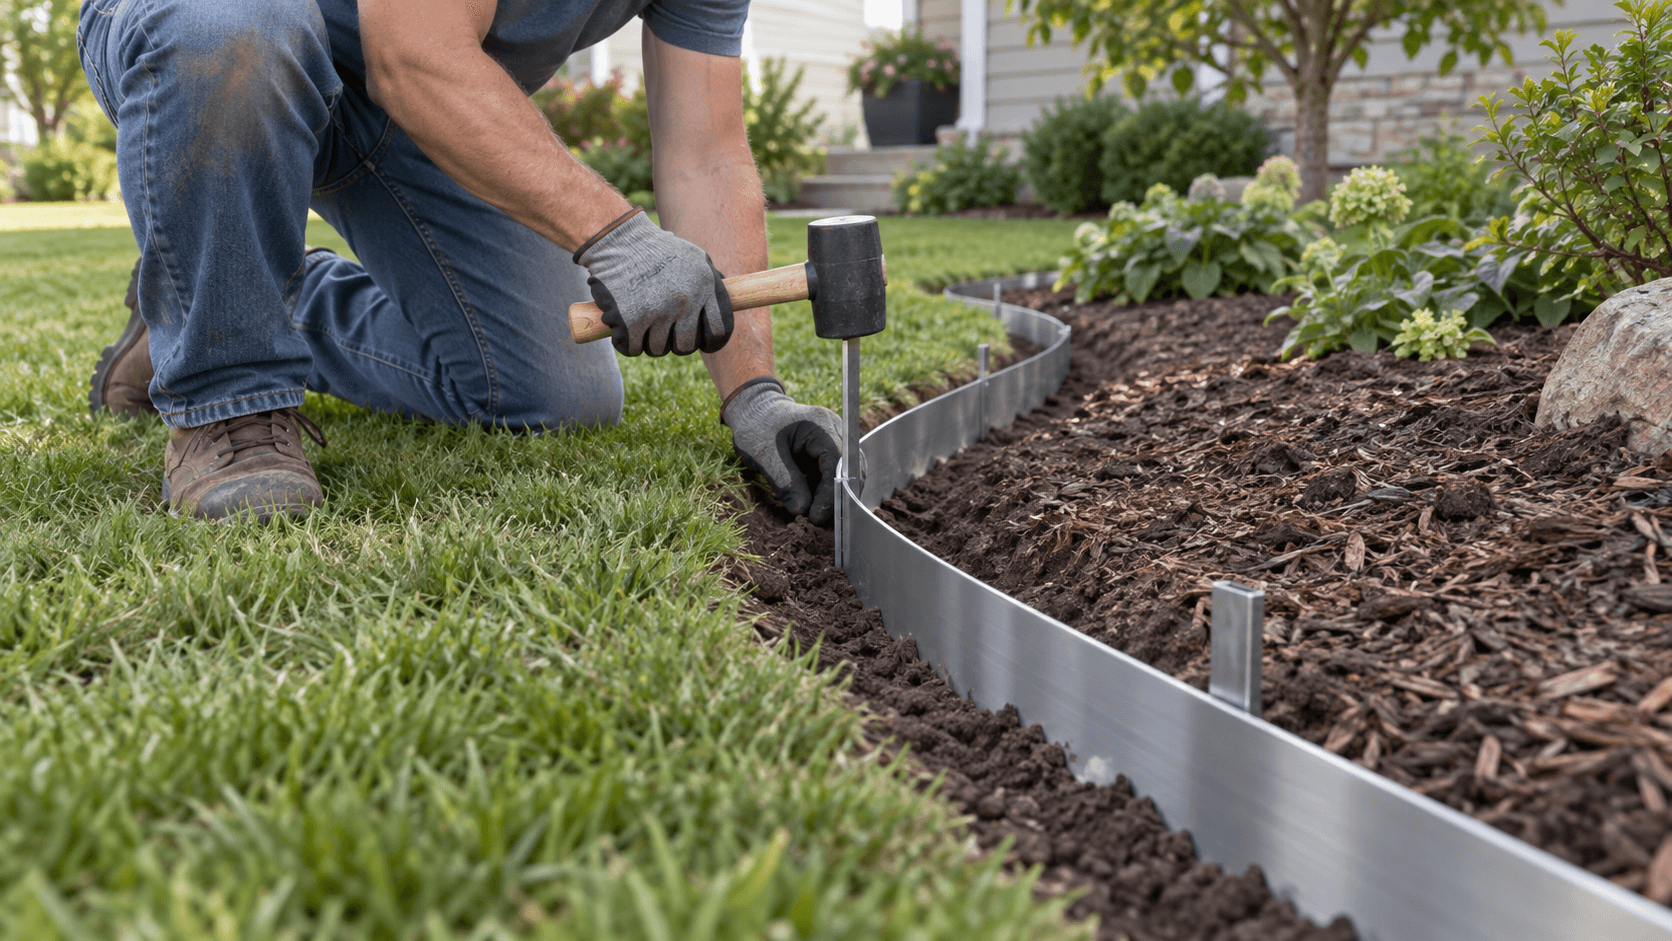
Partially set stakes first so the whole run can be evaluated. Step back and correct flat spots, sudden bends, or a wandering straight line. Then drive stakes through the intended loops or slots and to the specified depth.
Add support where the instructions call for it—often near joints, ends, tight curves, or grade changes—but do not improvise extra holes that weaken the edging. Use a mallet or hammer appropriate to the stake material, keep hands clear, and wear eye protection.
Backfill and compact
Backfill both sides in shallow lifts and compact enough to remove voids without deforming the edge. Restore the lawn side to its finished grade. Keep mulch or decorative stone below the containment height and away from siding, wood framing, and drainage openings.
If landscape fabric is part of the bed, terminate or lap it exactly as the edging and surface-material system requires. Fabric does not eliminate all weeds and should not block intended drainage.
Inspect the whole boundary
Walk the line and confirm that:
- open ends are capped, buried, or otherwise made safe;
- stakes and connectors are fully seated;
- no section rocks when adjacent soil is pressed;
- mower wheels can travel safely without contacting the edge;
- runoff still follows the planned path;
- the boundary does not create a hidden trip point at a walkway.
Recheck after heavy rain and seasonal soil movement. Correct emerging ends or loose stakes before they become hazards.
Common mistakes
- Choosing decorative edging where structural paver restraint is required.
- Digging before locating utilities and irrigation.
- Copying a generic trench depth instead of reading the product instructions.
- Driving all stakes fully before checking the complete curve.
- Leaving a sharp cut end exposed.
- Setting the edge so high that it interferes with walking or mowing.
Source
Frequently Asked Questions
How high should landscape edging sit above the ground?
Can landscape edging be installed without digging?
Is landscape edging the same as paver edge restraint?
About the author
Jane DIY
— Senior Reviews EditorJane DIY is the Senior Reviews Editor for DIY Tool Guide. Her byline identifies articles she reviews for clarity, sourcing, and practical usefulness.
More from Outdoor & Garden
How to Clean and Stain a Wood Deck in 2026
Clean and stain a sound wood deck with careful inspection, coating-compatible preparation, controlled application, weather planning, and full drying time.

How to Install Garden Drip Irrigation in 2026
Plan and install a faucet-fed garden drip system with compatible backflow protection, filtration, pressure regulation, tubing, emitters, flushing, testing, and seasonal care.
How to Sharpen a Lawn Mower Blade Safely in 2026
Sharpen a removable lawn mower blade safely by isolating power, recording orientation, inspecting for damage, preserving the original bevel, balancing, and torquing it correctly.