
How to Stain Unfinished Wood in 2026
Stain unfinished interior wood by identifying the species, preparing grain consistently, testing the complete finish schedule, controlling absorption, and applying a protective topcoat.
Affiliate disclosure: We may earn a commission on purchases made through links in this article, at no extra cost to you. Learn more.
Wood stain is transparent enough to reveal preparation differences. A scratch, glue smear, sanding swirl, filler patch, and patch of end grain can each absorb color differently and become more visible after staining.
This guide covers unfinished interior wood. Previously finished furniture, floors, exterior wood, food-contact items, children's products, and historically significant pieces require finish systems selected for those uses.
Identify the wood and intended use
Determine the species or at least whether the project contains different woods, veneer, plywood edges, filler, and solid lumber. Pine, maple, cherry, oak, and poplar do not accept the same stain in the same way.
Select a stain and protective finish that are mutually compatible and approved for the object's use. Check ventilation, temperature, disposal, recoat, and cure requirements before starting.
Build a sample board
Use scrap from the project whenever possible. Prepare it exactly like the final piece, including the same sanding sequence, conditioner, stain dwell time, number of coats, and clear finish. A store sample on a different species is not a reliable prediction.
Create labeled sections for alternatives, but write on the back rather than the finish face. View cured samples in the room lighting where the object will be used. Minwax likewise emphasizes that stain color is influenced by the particular wood and should be tested first.
Prepare the surface consistently
Remove glue squeeze-out, pencil marks, milling glaze, scratches, and dents. Repair defects with a stain-compatible filler, recognizing that filler may not match surrounding wood after staining.
Sand with the grain through the abrasive sequence recommended for the product. Skipping grits leaves scratches; over-sanding selected areas changes absorption. Ease sharp edges lightly without rounding profiles.
End grain often darkens because it absorbs more stain. Sand it more finely only when the finishing guidance supports that approach and the sample confirms the result.
Vacuum dust with a soft brush attachment, then use the approved final wiping method. Do not introduce silicone polish or an incompatible tack-cloth residue.
Decide on conditioner
Blotch-prone woods may benefit from pre-stain conditioner. Use the conditioner designed for the stain chemistry and apply it within its stated stain window. An oil-based conditioner is not automatically compatible with a water-based stain, or vice versa.
Compare conditioned and unconditioned samples. Conditioner can create a more even appearance while also making the color lighter.
Apply stain in manageable sections
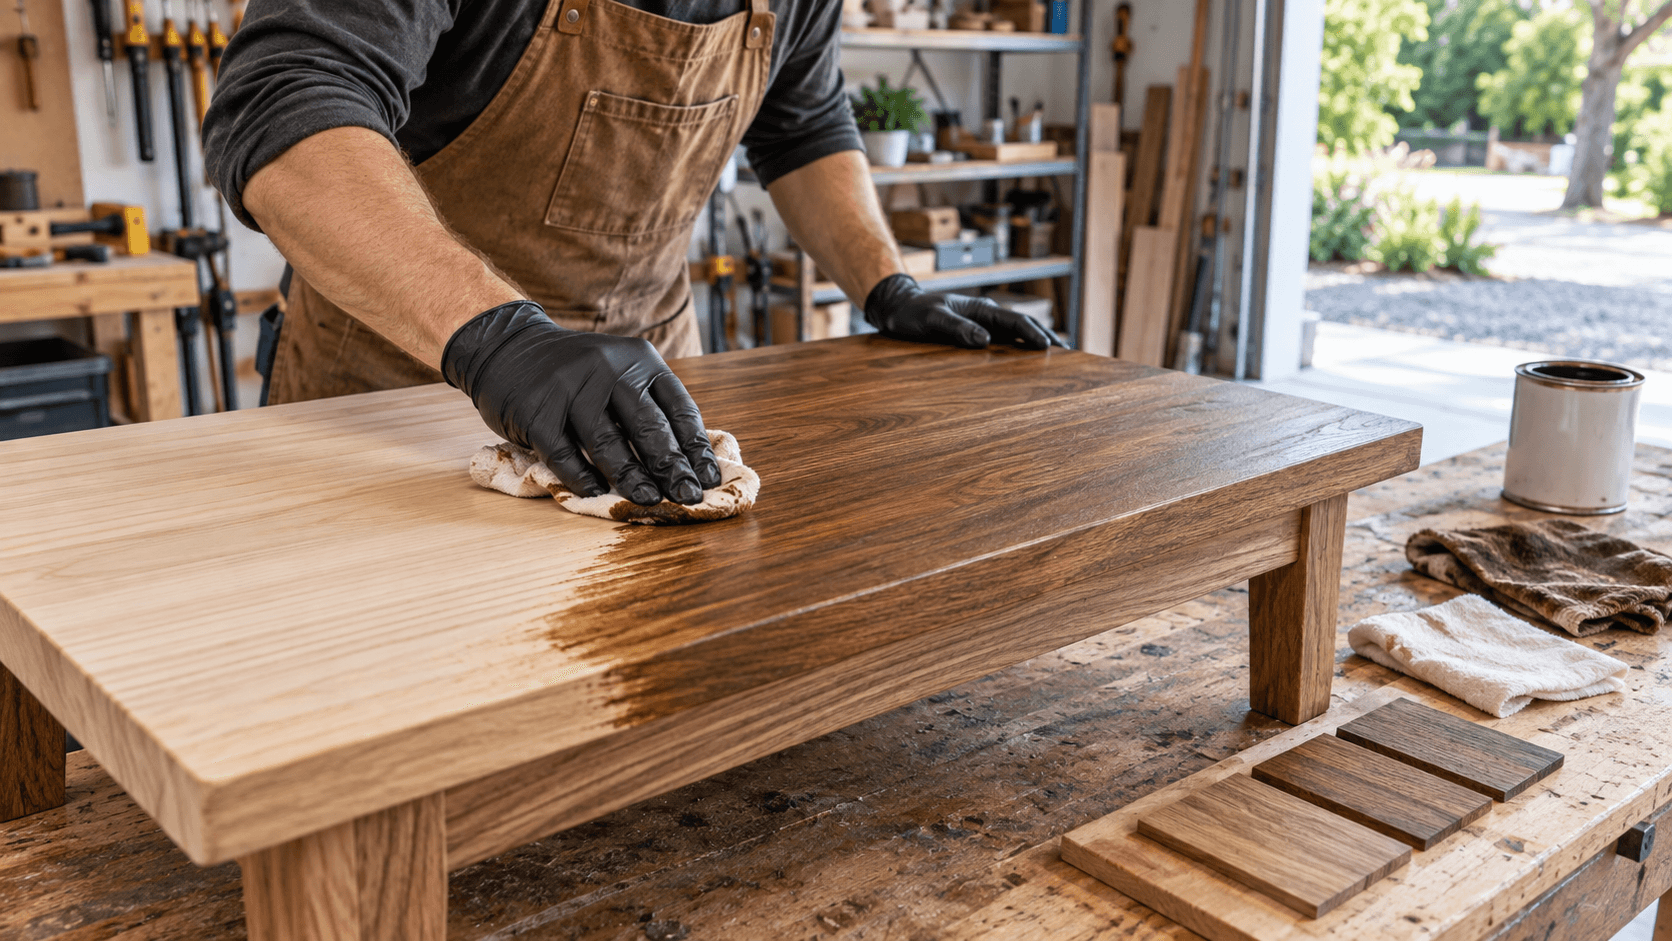
Stir the stain as directed. Apply with the specified brush, pad, or lint-free cloth, working with the grain. Keep a wet edge and cover a manageable area so dwell time remains consistent.
After the label-specified penetration time, remove all excess in the grain direction with clean material. Uneven wiping can leave sticky patches or color bands. Never leave a heavy wet film unless the product is specifically designed as a film-forming finish.
Allow the stain to dry fully. Apply another coat only when the label permits it and the sample shows the desired effect.
Manage rags and ventilation safely
Oil- or solvent-soaked rags can self-heat when crumpled together. Follow the product label and local fire-disposal guidance exactly. Keep ignition sources away, ventilate as required, and use the specified gloves and respirator controls.
Do not leave used rags piled on a bench, in an ordinary open trash basket, or inside the building while deciding what to do with them.
Apply the protective finish
Once the stain reaches its stated readiness, apply the compatible clear finish in thin coats with the grain. Stir products that instruct stirring; shaking can introduce bubbles into some finishes.
Respect recoat sanding and dust-removal instructions. Build only the number of coats appropriate for the expected wear, then allow full cure before loading the surface or exposing it to water and household chemicals.
Common mistakes
- Selecting color from the can label without a project-specific test.
- Leaving glue residue that blocks stain.
- Sanding different areas to different endpoints.
- Treating end grain like face grain without testing.
- Leaving excess stain on the surface.
- Piling used oily rags together.
- Applying clear finish before stain is ready.
Sources
Frequently Asked Questions
Does unfinished wood need conditioner before staining?
Does wood stain protect the wood by itself?
Why did the stain turn out darker on the end grain?
About the author
Jane DIY
— Senior Reviews EditorJane DIY is the Senior Reviews Editor for DIY Tool Guide. Her byline identifies articles she reviews for clarity, sourcing, and practical usefulness.
More from Painting & Finishing
How to Fix Peeling Paint on Interior Walls in 2026
Fix peeling interior wall paint by identifying moisture or adhesion failure, addressing lead risk, removing only failed material, repairing edges, priming, and repainting.
How to Paint a Front Door in 2026
Paint a front door with a substrate-aware plan for weather, hardware removal, cleaning, repairs, sanding, primer, thin finish coats, edges, and curing.
How to Paint Interior Trim and Baseboards in 2026
Paint interior trim and baseboards with careful cleaning, repairs, sanding, caulk decisions, compatible primer, controlled brushwork, and proper cure time.