
How to Start Backyard Composting in 2026
Start a manageable backyard compost pile with the right location, useful brown and green materials, moisture, airflow, pest controls, and readiness checks.
Affiliate disclosure: We may earn a commission on purchases made through links in this article, at no extra cost to you. Learn more.
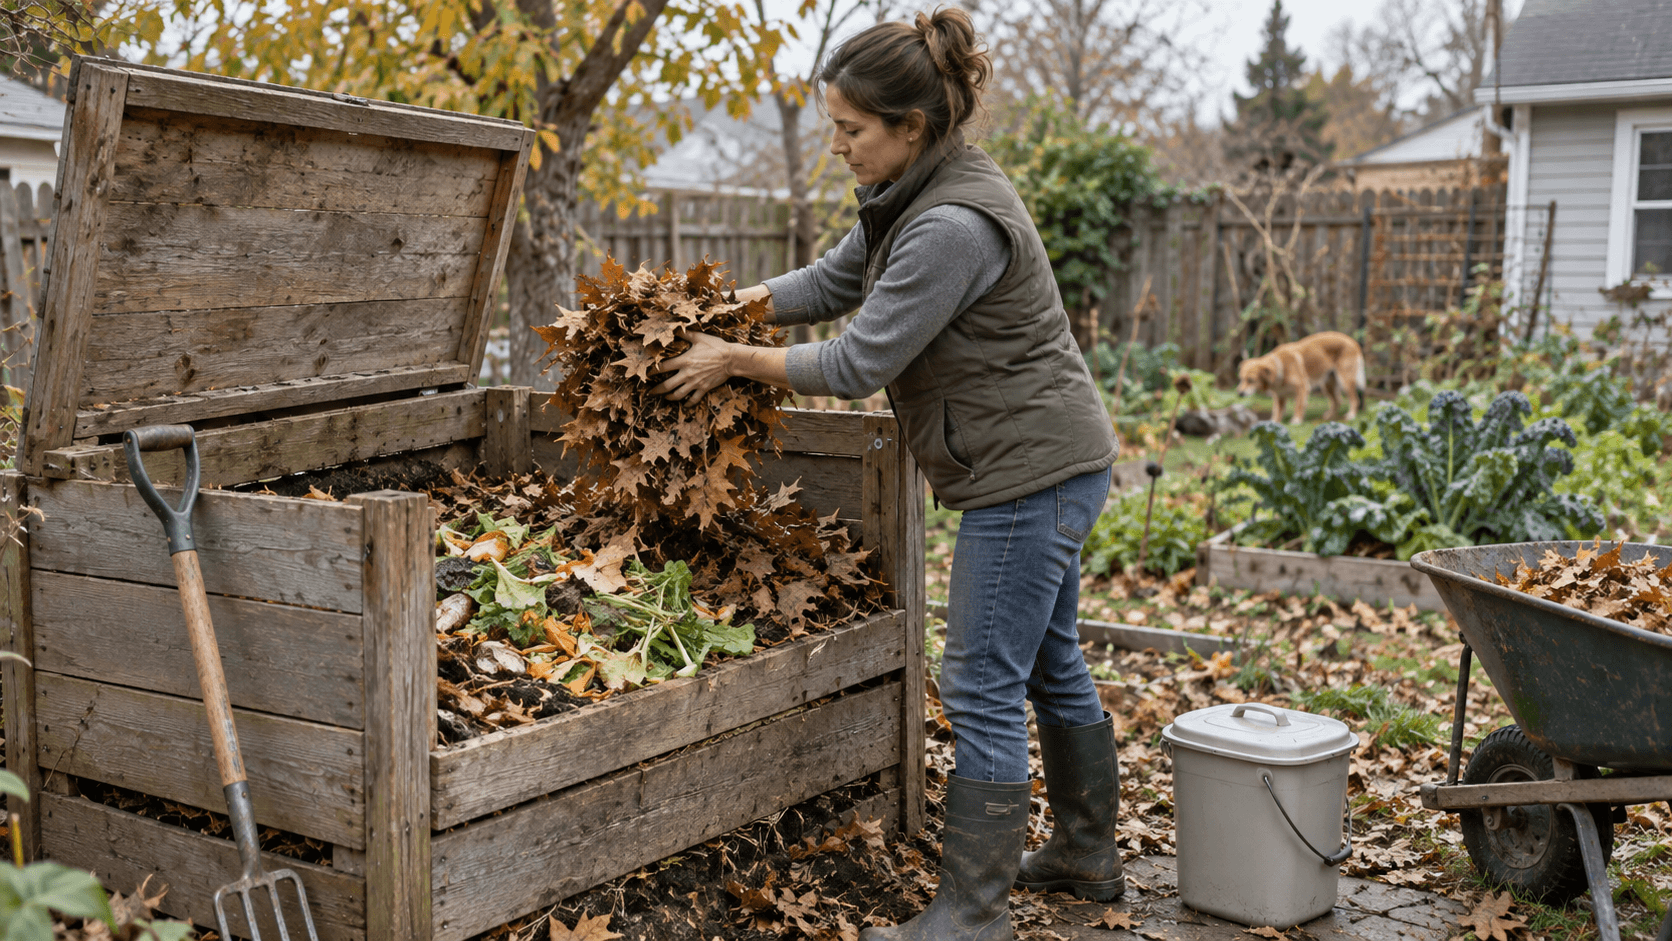
Backyard composting turns selected food scraps and yard trimmings into a soil amendment through managed aerobic decomposition. The useful word is managed: a random heap can become wet, compacted, attractive to animals, or frustratingly inactive.
This guide covers an ordinary outdoor pile or enclosed bin. Municipal rules, wildlife pressure, wildfire risk, rental restrictions, and cold-climate conditions vary, so confirm local requirements before choosing a system.
Choose the system and location
A simple pile offers easy turning but little pest protection. An open-bottom bin contains material while maintaining soil contact. A tumbler is compact and enclosed, although its smaller volume and moisture behavior differ from a ground pile.
Choose a site with good drainage, year-round access, and a nearby water source. Avoid placing the pile directly against a wood fence, building, tree trunk, drainage route, utility access, or property line. Leave working room to turn and harvest material.
Gather browns and greens
Microorganisms need carbon, nitrogen, water, and oxygen. Carbon-rich “browns” create structure and include dry leaves, small untreated twigs, plant stalks, untreated wood chips, and acceptable shredded uncoated paper or cardboard. Nitrogen-rich “greens” include fruit and vegetable scraps, coffee grounds with paper filters, fresh grass clippings, and green garden trimmings.
EPA guidance suggests adding roughly two to three volumes of browns for each volume of greens as a practical starting point. Treat that as an operating guide, not laboratory precision. Material moisture, particle size, and density matter.
Do not add meat, fish, bones, dairy, fats, grease, pet waste, cat litter, treated or painted wood, glossy paper, produce stickers, or ordinary “compostable” serviceware unless it is explicitly approved for home composting. Keep herbicide-treated clippings, aggressive weeds, seeded weeds, and diseased plants out when local guidance recommends another disposal route.
Build the first pile
Start with a loose 4- to 6-inch layer of bulky browns to encourage air movement and absorb excess liquid. Add greens in thinner layers, mixing rather than creating a dense mat of grass. Cover every food-scrap addition with several inches of dry leaves or other browns.
Break up tough pieces, but do not pulverize everything. Smaller material decomposes faster; some coarse structure keeps air pathways open. Moisten dry ingredients until the mixed pile feels like a wrung-out sponge, not a dripping mass.
A pile needs enough volume to retain some heat, but there is no reason to build beyond what you can manage safely. Do not compact it by standing on it.
Maintain moisture and airflow
Turn the outside material toward the center with a garden fork when the pile compacts, smells, or needs mixing. Turning can accelerate decomposition, but a pile does not need daily disturbance.
Use symptoms to make small corrections:
- Dry and inactive: mix while adding water gradually, then cover to slow evaporation.
- Wet or sour-smelling: add dry browns, loosen compacted layers, and correct runoff or drainage.
- Food visible or pests investigating: bury scraps in the center, cover them with browns, secure the lid, and close oversized gaps.
- Not heating: confirm there is moisture, oxygen, adequate volume, and some fresh greens before adding any commercial accelerator.
EPA notes that a well-managed backyard pile can reach 130–160°F, but a cool pile can still decompose more slowly. Do not assume household compost has reliably destroyed pathogens, weed seeds, or persistent herbicides.
Control rodents without creating a trap
Exclude attractive food and keep scraps covered. In areas with rodents, use a secure lid and appropriate corrosion-resistant mesh with openings no larger than local guidance recommends. Fold or cap sharp cut edges. Avoid placing poisoned bait in or around compost where children, pets, and wildlife may encounter it.
Persistent animal activity may require a different bin or a municipal collection service rather than repeated patching.
Harvest and cure compost
Stop adding fresh material to one section when it becomes dark and mostly uniform. After turning no longer causes reheating and recognizable food scraps are gone, allow the compost to cure. EPA recommends at least four weeks of curing and says a well-maintained pile may finish in roughly three to five months; an unattended one can take much longer.
Screen unfinished twigs and pits back into the active pile. Use mature compost as a soil amendment or surface mulch according to the needs of the site and plants. Compost is not a complete fertilizer guarantee, and excessive application can create nutrient problems.
Common mistakes
- Buying a bin before checking whether the location is practical.
- Adding food faster than the available browns can cover it.
- Treating every “compostable” label as suitable for a backyard pile.
- Letting grass clippings form an airless mat.
- Sealing a wet pile with no airflow.
- Applying unfinished material directly around sensitive plants.
Sources
Frequently Asked Questions
What should a beginner put in a backyard compost pile?
Why does a compost pile smell bad?
How do you know compost is finished?
About the author
Jane DIY
— Senior Reviews EditorJane DIY is the Senior Reviews Editor for DIY Tool Guide. Her byline identifies articles she reviews for clarity, sourcing, and practical usefulness.
More from Outdoor & Garden
How to Clean and Stain a Wood Deck in 2026
Clean and stain a sound wood deck with careful inspection, coating-compatible preparation, controlled application, weather planning, and full drying time.
How to Install Garden Drip Irrigation in 2026
Plan and install a faucet-fed garden drip system with compatible backflow protection, filtration, pressure regulation, tubing, emitters, flushing, testing, and seasonal care.
How to Install Landscape Edging in 2026
Install landscape edging with a planned line, product-specific trench, secure connections, correct staking, finished grade, and safer transitions.