
How to Fix a Leaky Faucet (With Safety Precautions)
Most household faucet leaks are a 30-minute DIY repair. This guide covers diagnosing the leak type, the tools you need, the step-by-step fix for the two most common faucet designs, and — importantly — when to stop and call a plumber.
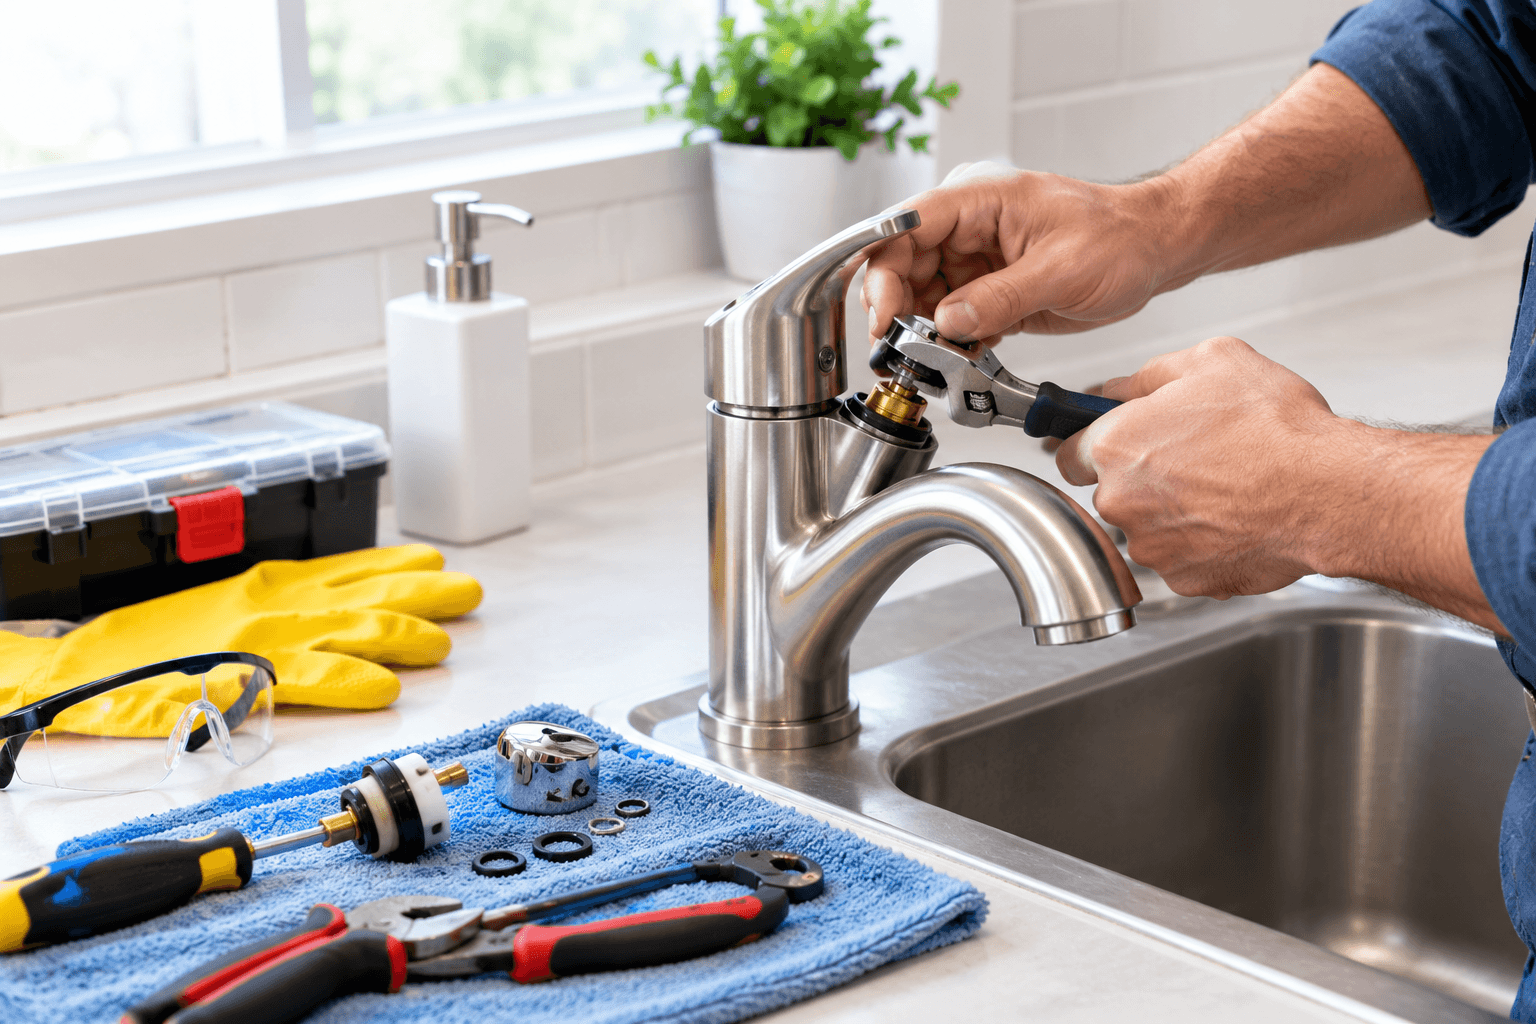
A dripping faucet is more than annoying — a slow drip wastes 3,000+ gallons of water per year and stains sinks over time. The good news: most faucet leaks are a simple, cheap repair that you can complete in 30 minutes with basic tools. This guide covers the two most common household faucet types, plus the safety warnings and stopping points every homeowner should know.
Identify your faucet type first
Before you buy parts, figure out what kind of faucet you're dealing with. The two most common types in US homes:
Compression faucets — two separate handles (hot and cold) that require multiple full turns to shut off. When you close them fully, you feel the handle "tighten." Most older bathroom faucets and utility sinks are compression style.
Cartridge faucets — usually a single lever, or handles that turn only a quarter to half turn. Common in modern bathrooms and nearly universal in kitchen sinks. Includes single-handle "ceramic disc" and "ball" designs.
There are also ball faucets (single-handle kitchen faucets with a rotating ball inside) and ceramic disc faucets (premium single-handle, very durable). Both are variants of the cartridge family and repair similarly.
Diagnose the leak
Leak from the spout when off: worn washer (compression) or worn cartridge (cartridge). This is the most common leak.
Leak from around the handle base: worn O-ring or packing nut needs tightening.
Leak from under the sink: supply line connection, drain trap, or faucet body crack. Not the same as a spout leak — different repair.
Low water pressure from the spout: aerator clogged with mineral deposits. Unscrew it, soak in vinegar, replace. Not really a "leak" but often confused with one.
Tools you'll need
- Adjustable wrench (8-inch)
- Phillips and flathead screwdrivers
- Allen (hex) wrench set — many cartridge handles use tiny set screws
- Needle-nose pliers
- Old towel (to plug the drain — prevents dropped parts from disappearing forever)
- Cellphone camera (take photos of every step as you disassemble — invaluable when it's time to reassemble)
You may also need a replacement cartridge, washer kit, or O-ring set — but wait to buy these until you've opened up the faucet and can identify exactly what you need. Bring the old part to the hardware store; matching is easier with the physical part in hand than by brand name alone.
Fixing a compression faucet (two-handle, older style)
The most common cause of a compression faucet leak is a worn rubber washer at the bottom of the valve stem.
Step 1: Water off. Close the supply valves. Open the faucet to relieve pressure.
Step 2: Remove the handle. Look for a decorative cap on top of the handle — often just a snap-in plastic disc marked "H" or "C." Pop it off with a flathead screwdriver. Underneath is a Phillips or slotted screw. Remove it, then lift off the handle.
Step 3: Remove the packing nut. Under the handle is a hex nut (the "packing nut") that holds the valve stem in place. Loosen counterclockwise with your adjustable wrench. Wrap the nut with a piece of tape or a rag first if you want to avoid marring the finish.
Step 4: Remove the valve stem. Once the nut is off, the stem should thread out — turn it counterclockwise as though you were opening the faucet. Continue until it comes free.
Step 5: Replace the washer. At the bottom of the valve stem is a rubber washer held by a single brass screw. Remove the screw, replace the washer with an exact match (bring the old one to the hardware store), reinstall the screw.
Step 6: Check the O-ring. While you're in there, replace the O-ring around the middle of the valve stem too. It's a cheap part that fails on the same schedule.
Step 7: Inspect the valve seat. Look inside the faucet body where the washer sits. If the seat is smooth and shiny, great. If it's rough or pitted, that's why your old washer wore out fast — you may need a seat-dressing tool (about $15) to smooth it, or a seat wrench to remove and replace it if it's a threaded type.
Step 8: Reassemble. Reverse the disassembly. Hand-tight is enough for the valve stem; the packing nut should be firm but not gorilla-tight.
Step 9: Water on, test. Open the shutoff valves slowly. Turn the faucet on and let it run for 30 seconds to purge air. Check for drips at the spout and around the handle.
Fixing a cartridge faucet (single-handle or modern two-handle)
Cartridge faucets don't have replaceable washers — you replace the entire cartridge as a single unit.
Step 1: Water off. Same as before — close the supply valves and relieve pressure.
Step 2: Remove the handle. Cartridge handles are usually secured by a small Allen (hex) set screw hidden under a decorative cap. Pry the cap off gently, use the right size Allen wrench to loosen the set screw, then lift off the handle.
Step 3: Remove the retaining clip or nut. With the handle off, you'll see a cartridge inside a housing. Most cartridges are held in place by either a horseshoe-shaped metal clip that pulls straight up with needle-nose pliers, or a large retaining nut that unscrews.
Step 4: Pull the cartridge. Grasp the top of the cartridge and pull straight up. Some come out easily; older ones can be stubborn. If it won't budge, a $12 cartridge puller (specific to your faucet brand) makes this trivial.
Step 5: Match and replace. Take the old cartridge to the store and match it exactly. Cartridges are brand-specific — a Moen 1225 is not interchangeable with a Delta RP1740. Note that name-brand faucets (Moen, Delta, Kohler, Price Pfister) often offer free lifetime warranty replacement cartridges — check the manufacturer's website before you buy.
Step 6: Install the new cartridge. Orient it the same way the old one came out (there's usually an alignment tab). Push it firmly into position, replace the retaining clip or nut.
Step 7: Reassemble handle. Reverse of Step 2.
Step 8: Water on, test. Slowly reopen the shutoff valves, run the faucet, check for leaks.
Pros
- Cartridge faucets: replacement is usually simpler than compression faucet washer swap — one unit replaces everything at once
- Name-brand cartridges are often free under lifetime warranty
- Modern ceramic disc cartridges can last 20+ years before needing replacement
- No small springs or seats to lose down the drain
Cons
- Cartridges are brand-specific and can be hard to find for older or off-brand faucets
- Some cartridges are notoriously stuck after years of installation — may need a puller tool
- Full replacement cartridge is more expensive than a $2 rubber washer
When to stop and call a plumber
DIY faucet repair is genuinely safe and beginner-friendly for the scenarios above. But some situations require a licensed professional:
For a small percentage of homes, especially older ones, "just replacing the cartridge" turns into "the shutoff valve won't close" turns into "the whole supply line needs to be replaced." When you hit that pattern, stop working and call a licensed plumber. A $250 service call is a rounding error compared to flood damage.
Preventing future leaks
- Don't overtighten handles. Turning the handle beyond its natural stop wears the internal parts fast. Snug is enough.
- Address slow drips promptly. A slow drip today is a running leak in six months and a stripped valve seat in two years.
- Clean aerators annually. Mineral deposits in the aerator force water back through the faucet at higher pressure, stressing internal parts.
- Know where your main water shutoff is. Every homeowner should be able to shut off water to the entire house in 30 seconds — before a plumbing emergency, not during one.
Most faucet leaks are the kind of small, satisfying DIY repair that saves real money and takes less than an hour. Just be honest with yourself about when a repair has moved past DIY territory — the water damage from a bad plumbing call costs orders of magnitude more than a professional service call.
Frequently Asked Questions
How do I know if my faucet is a compression or cartridge type?
What tools do I need to fix a leaky faucet?
Why is my faucet still leaking after I replaced the washer?
Should I call a plumber for a leaky faucet?
How much does it cost to fix a leaky faucet?
About the author
Jane DIY
— Senior Reviews EditorJane has been renovating houses for 12 years and writes tool reviews you can actually act on. She currently owns and uses every drill in our roundups and does not accept manufacturer samples she cannot return.