
How to Fix a Running Toilet: Diagnose Before Buying Parts
Find why a toilet keeps running, test the flapper and fill valve, make safe adjustments, and know when the repair needs a plumber.
Affiliate disclosure: We may earn a commission on purchases made through links in this article, at no extra cost to you. Learn more.
A toilet that runs continuously or refills by itself is signaling a leak, an incorrect water level, or a control part that is not completing its cycle. The sound may be obvious, but a tank can also lose water silently and refill only every few minutes.
Do not start by buying a “universal” flapper or turning every adjustment screw. Remove the tank lid carefully, watch one complete flush, and identify where the water goes. The flapper, chain, fill valve, float, refill tube, overflow tube, and flush-valve seat each have a different job.
This guide covers conventional residential gravity toilets with an accessible tank. Pressure-assisted, wall-hung, smart, concealed-tank, and flushometer fixtures require their own service instructions.
Stop if the problem is more than a tank adjustment
Close the toilet's supply stop and contact a plumber, building manager, or qualified service provider when:
- water is escaping onto the floor, into a wall, or around the base;
- the porcelain tank or bowl is cracked;
- the shutoff valve is corroded, leaking, seized, or unable to stop the flow;
- the supply connector is kinked, swollen, frayed, or dripping;
- the toilet rocks, the floor feels soft, or the flange connection may be damaged;
- sewage backs up, several fixtures drain poorly, or the bowl level behaves abnormally;
- the fixture uses a pressure vessel or concealed mechanism you cannot identify.
Porcelain can crack from impact or overtightened hardware. Do not lean on the open tank, force its fasteners, or attempt to seal a structural crack.
Learn what happens during a normal flush
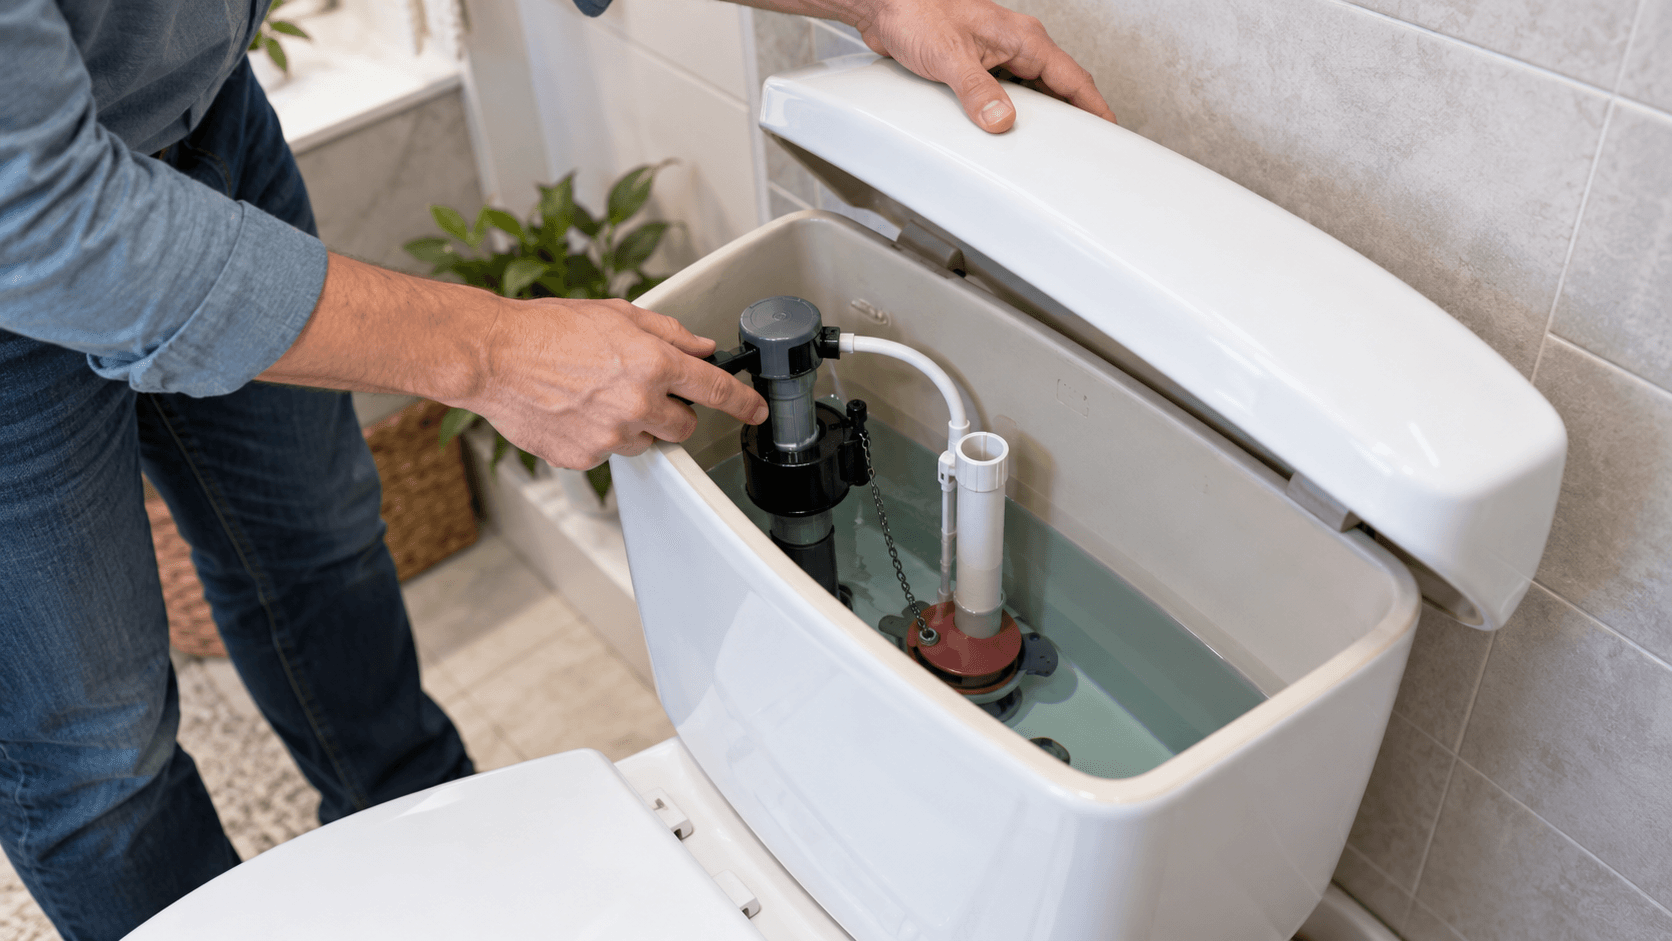
Pressing the handle lifts the flapper or flush-valve seal. Tank water enters the bowl, the seal returns to its seat, and the fill valve opens to refill the tank. A small refill tube sends part of that water into the overflow tube to restore the bowl's water level. The float then tells the fill valve to stop.
Watch for these patterns:
| What you observe | Likely area to inspect | |---|---| | Flapper stays partly open | Chain length, handle arm, flapper hinge, or incompatible flapper | | Water ripples into the bowl after the flapper closes | Flapper or flush-valve seal, debris, or damaged seat | | Water flows over the top of the overflow tube | Fill-valve adjustment, float movement, or failed fill valve | | Fill valve never opens enough to refill | Supply stop, inlet screen, float, or fill valve | | Tank fills correctly, then refills minutes later | Slow tank-to-bowl leak | | Water sprays from the refill tube or valve connection | Tube attachment, valve cap, or model-specific failure |
Take a photo of the inside of the tank and any model numbers before moving parts. The correct replacement often depends on the toilet model, flush-valve diameter, and fill-valve design.
Confirm a silent leak with a dye test
EPA WaterSense recommends placing a few drops of food coloring or a dye tablet in the tank, waiting about 10 minutes without flushing, and checking the bowl. Color in the bowl confirms that tank water is passing into it. Flush immediately after the test to avoid staining.
A positive dye test proves a tank-to-bowl leak; it does not prove that the flapper alone is defective. First check whether the chain is holding the seal up, whether debris is on the seat, and whether the installed seal matches the flush valve.
If the dye remains in the tank but water visibly flows into the overflow tube, concentrate on the fill valve, float, and water-level adjustment instead.
Check the handle and chain
The chain needs enough slack for the flapper to sit fully on its seat, but not so much that it becomes trapped underneath. The handle arm should move freely and return without rubbing the tank wall or catching another part.
Turn the toilet supply off before placing your hands in the tank. Flush to lower the water, then:
- confirm that the handle arm is secure but not binding;
- remove a chain kink or move the hook only as directed by the toilet or flapper instructions;
- make sure the chain cannot slide under the seal;
- restore water and watch several flushes.
Do not shorten the chain until it pulls the flapper upward at rest. That creates a permanent leak.
Inspect the flapper or flush-valve seal
Turn off the supply, flush, and hold the handle long enough to drain most of the tank. The remaining water is clean supply water, but gloves are sensible when handling an older rubber part.
Look for:
- a warped, cracked, swollen, or hardened sealing edge;
- mineral deposits or debris on the seal and seat;
- hinges that bind or do not align the flapper;
- a float or chain arrangement that differs from the original design;
- an obviously incorrect diameter or attachment style.
Clean the accessible sealing surface gently using the fixture manufacturer's method. Do not scrape porcelain or plastic with a metal tool. If replacement is required, use the toilet model and flush-valve dimensions to find a compatible part. EPA guidance specifically recommends matching the replacement to the toilet model rather than relying on appearance alone.
After installation, restore water slowly, complete several flushes, and repeat the dye test.
Check the water level and fill valve
If water enters the overflow tube after the tank fills, the float may be set too high, obstructed, waterlogged, or unable to shut the valve. A fill valve can also fail internally.
Find the tank's waterline mark and the fill-valve manufacturer's adjustment instructions. Depending on the design, adjustment may use a screw, clip, rod, or sliding body. Make one small documented adjustment, refill the tank, and recheck the level.
The overflow tube is a safety path. Do not extend, cap, plug, or cut it as a shortcut. If the correct water level cannot be maintained, replace the fill valve with a compatible model or call a plumber.
Position the refill tube correctly
The refill tube normally attaches above the overflow opening using a clip specified by the valve manufacturer. It should not be pushed deeply down the overflow tube, where it can create unwanted siphoning on some installations. Follow the valve's diagram for the required air gap and attachment.
Replacing an accessible fill valve
Only proceed when the local shutoff works, the supply connector is sound, and the tank and mounting area are accessible.
- Close the supply stop, flush, and sponge remaining water from the tank.
- Put a towel and shallow container below the supply connection.
- Disconnect the supply connector without twisting the shutoff valve or rigid piping.
- Remove the valve retaining nut while supporting the valve inside the tank.
- Clean the mounting opening and install the compatible valve at the instructed height.
- Tighten the retaining nut according to the manufacturer; overtightening can damage plastic or porcelain.
- Reconnect a sound supply connector. Replace it if its manufacturer or condition requires replacement.
- Attach the refill tube correctly, open the stop slowly, and watch every connection.
- Set the water level, flush repeatedly, dry the area, and inspect again after several minutes.
If a connection will not seal without excessive force, close the supply and stop. Random tape or sealant is not a substitute for the correct washer and connection type.
If the toilet still runs
Repeat the observation rather than replacing a second part by guesswork. A new flapper may be incompatible, the chain may be too tight, the flush-valve seat may be damaged, or the fill valve may still discharge into the overflow. A leak around the flush-valve body can require tank removal and model-specific gaskets.
Tank removal introduces brittle porcelain, mounting hardware, and larger seals. Call a plumber if the hardware is corroded, the tank is unstable, or you cannot identify the correct tightening sequence.
Prevent repeat leaks
- Test the toilet periodically with dye, especially when water use rises unexpectedly.
- Keep bowl cleaners out of the tank unless the toilet manufacturer approves them; some chemicals can damage rubber and plastic parts.
- Do not use the tank lid as a shelf or drop it onto the tank.
- Check the supply stop and connector visually without forcing the valve.
- Keep the toilet model information with your home-maintenance records.
Final recommendation
Observe a full flush, separate a tank-to-bowl leak from an overflow problem, and confirm the diagnosis with a dye test. Correct chain interference or a documented water-level setting before replacing parts. When a part is worn, match it to the toilet and follow its instructions.
Stop when water appears outside the fixture, isolation is unreliable, porcelain is damaged, or the repair requires forcing corroded connections. A running toilet wastes water; an uncontrolled plumbing repair can cause far more damage.
Sources and methodology
This guide is based on current water-efficiency guidance and manufacturer-style service practices. It does not claim a universal repair time, fixed savings, or compatibility between toilet parts.
Frequently Asked Questions
Why does my toilet run every few minutes?
How high should the water be in a toilet tank?
Can I bend the float arm to stop a running toilet?
When should I replace the whole toilet instead of repairing it?
About the author
Jane DIY
— Senior Reviews EditorJane DIY is the Senior Reviews Editor for DIY Tool Guide. Her byline identifies articles she reviews for clarity, sourcing, and practical usefulness.
More from Plumbing & Electrical
Why Your Circuit Breaker Keeps Tripping
Understand repeated breaker trips, perform safe load checks without opening the panel, and recognize overload, fault, moisture, and wiring warnings.
GFCI Outlet Won't Reset? Safe Checks Before You Call
Troubleshoot a GFCI receptacle that will not reset using safe external checks, and recognize moisture, wiring, and device failures for an electrician.
How to Unclog a Slow Bathroom Sink Safely
Clear a slow bathroom sink by checking the stopper and P-trap first, using mechanical methods safely, and recognizing a larger drain problem.
How to Fix a Leaky Faucet: Diagnose Before Buying Parts
Find where a faucet is leaking, identify the correct valve system and replacement part, repair it safely, and know when the problem needs a plumber.