
How to Build a Simple Raised Garden Bed
A straightforward guide to building a durable 4x8-foot raised garden bed in a single afternoon. Materials, dimensions, tools, soil, and the mistakes worth avoiding on your first build.
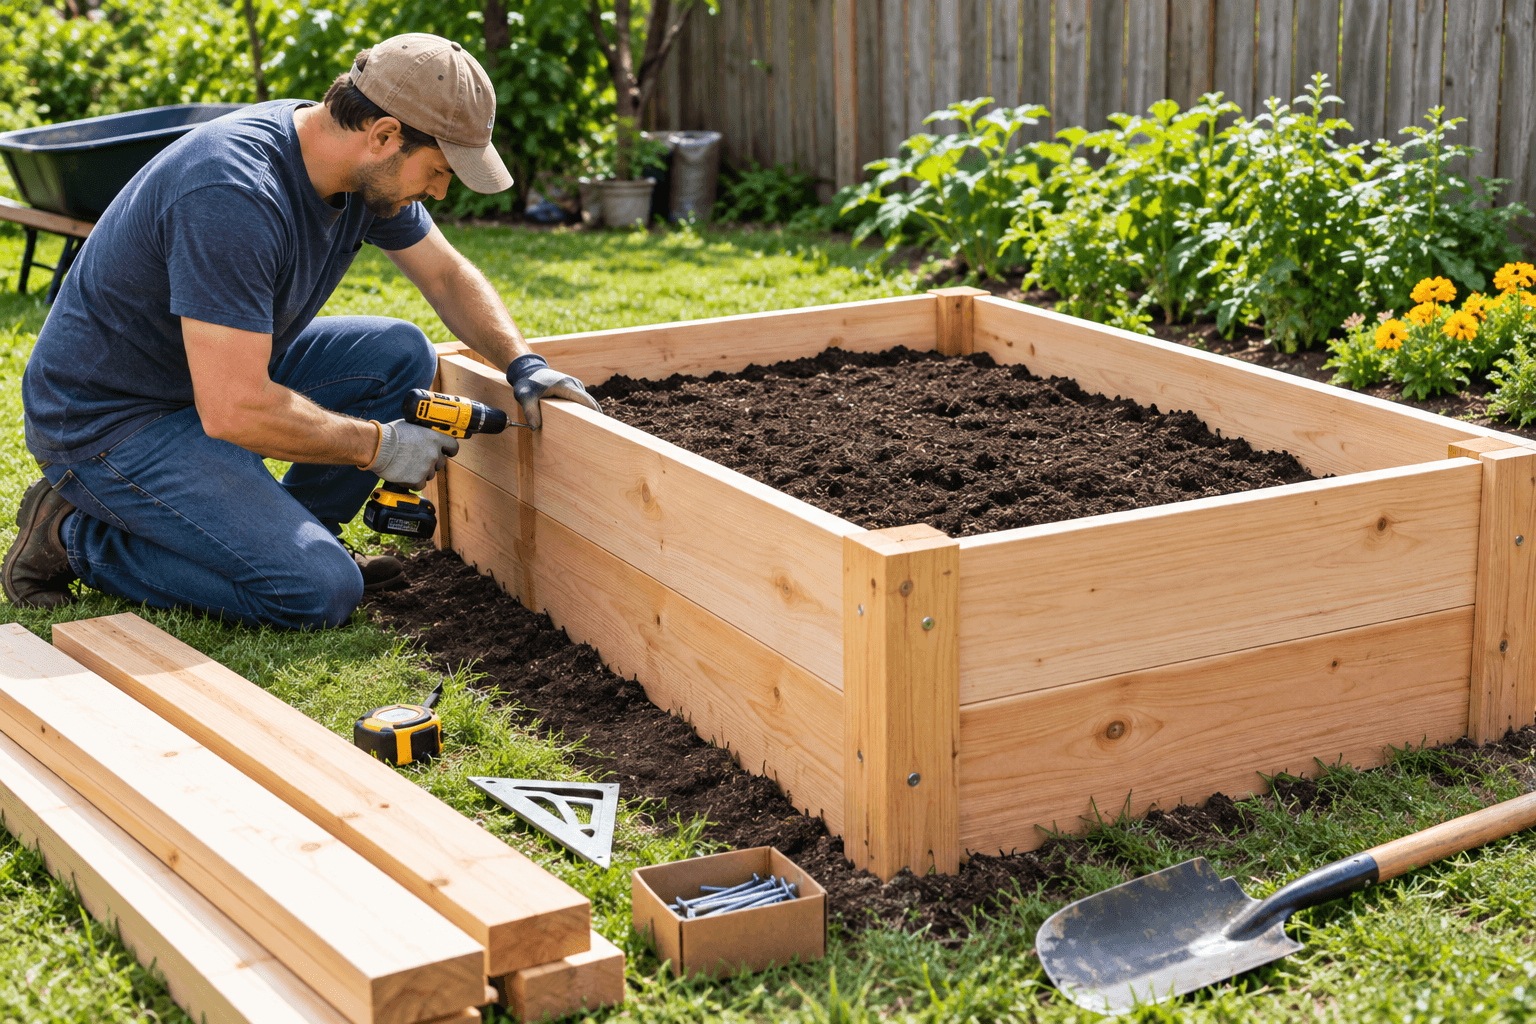
A raised garden bed is one of the best first outdoor projects a homeowner can tackle. It transforms an unused corner of the yard into a productive garden, and the construction itself is straightforward — a rectangle of boards, some screws, and an afternoon of work.
This guide walks through building a standard 4x8-foot bed at 12 inches deep, using materials you can buy at any home center. The design is deliberately simple: no complex joinery, no specialty hardware, no woodworking experience required.
Why 4x8 feet at 12 inches deep
The dimensions matter more than they seem.
Width of 4 feet — with the bed accessible from both sides, you can reach the middle without stepping in. Stepping in compacts the soil and damages roots.
Length of 8 feet — matches standard lumber sizes with zero cutting waste, and is long enough for a real harvest (2-4 tomato plants, a row of lettuce, herbs at one end, etc.).
Depth of 12 inches — matches standard 2x12 lumber and provides enough soil depth for most vegetables. If you plan to grow carrots, potatoes, or other root vegetables, go 18-24 inches deep instead.
Materials for a 4x8x12 bed
You'll need:
- 4 boards of 2x12 lumber, 8 feet long, in cedar or untreated Douglas fir
- Two will be used full-length for the long sides
- Two will be cut in half for the four short ends (a single 8-foot board yields both short sides)
- Wait — that's only 3 boards needed. Buy 4 for safety in case one is warped or split.
- 4 pieces of 4x4 lumber, 12 inches long each (for corner posts — provides interior clamping surface for screws)
- 32 exterior-rated deck screws, 3 inches long (stainless steel or coated for exterior use)
- 1 roll of hardware cloth, 4x8 feet, 1/4-inch mesh (optional, for gopher protection)
- Landscape fabric or cardboard (to smother grass underneath — optional if building on bare dirt)
Total lumber cost: approximately $80-150 depending on species and region. Cedar runs about 40% more than Douglas fir.
Choosing the wood
Pros
- Cedar: naturally rot-resistant, 8-12 year lifespan, beautiful color, no chemical treatment
- Douglas fir: cheapest option, 5-8 year lifespan, works fine untreated for garden use
- Both accept exterior stain on the outside for extra weather protection
Cons
- Redwood: gorgeous and rot-resistant but expensive and sourcing-sensitive
- Pressure-treated: cheapest and longest-lasting but many gardeners avoid it for food crops
- Reclaimed pallet wood: free but often chemically treated and structurally unreliable — avoid
Tools needed
- Circular saw or handsaw (for cutting 2x12s in half and 4x4 posts to length)
- Drill/driver with a Phillips or square bit
- Tape measure
- Square (a speed square is fine)
- Level (any length works, though 24" is easiest)
- Pencil
- Shovel (for site prep)
Optional but nice: a rubber mallet, clamps for holding boards in position while you drive screws, and safety glasses.
Site preparation
Pick your spot carefully — you're going to live with this decision for a decade.
Sunlight: most vegetables need 6-8 hours of direct sunlight per day. Watch your intended spot across a few days before building. A spot that looks sunny at noon might be shaded morning and evening.
Water access: you'll water this bed 3-5 times per week during growing season. If your hose won't reach, either move the bed or budget for a drip irrigation setup.
Drainage: avoid low spots that collect water after rain. The bed provides some drainage, but standing water underneath will rot the bottom boards.
Level ground: the site doesn't need to be perfectly flat, but wildly sloped ground makes for uneven soil levels inside the bed. If you're on a slope, plan to level the site with a shovel before building.
Once you've picked the spot:
- Mow the grass as short as possible.
- Lay cardboard or landscape fabric over the entire bed footprint (extending a few inches past). This smothers the grass over 4-8 weeks so it doesn't come up through your soil.
- Skip step 2 if you're building on bare soil already.
Construction (30-60 minutes)
Step 1: Cut the short sides. Take one of your 2x12x8 boards and cut it in half to get two 4-foot pieces. These are your short ends. If the board is exactly 8 feet, you'll get two pieces slightly under 4 feet (once you account for saw kerf). That's fine.
Step 2: Cut the corner posts. Cut four 12-inch lengths from a 4x4 post.
Step 3: Assemble one long side. Lay a full 8-foot 2x12 flat on the ground. Stand a 4x4 post at each end, flush with the top and end of the board. Drive two 3-inch screws through the 2x12 into each post, spaced vertically. You now have a long side with two vertical posts attached at each end.
Step 4: Repeat for the other long side.
Step 5: Attach the short ends. Stand both long sides on edge, parallel, 4 feet apart. Position a 4-foot short board at one end, flush against the corner posts. Drive two 3-inch screws through the short board into each post. Repeat at the other end.
Step 6: Square and level. Measure the diagonals corner-to-corner. If they're equal, your bed is square. If not, gently rack it until the diagonals match, then re-check that each board is level.
Step 7: Move the bed into position. With the bed empty, two people can lift and reposition it easily. Set it on your prepared site.
Step 8: Optional gopher screen. If you have burrowing pests, lay hardware cloth across the bottom before adding soil. Staple it to the inside of the boards along all four sides.
Filling the bed
A 4x8x12 bed holds 32 cubic feet of soil. Bagged soil is sold in cubic feet (typically 1 cubic foot per bag), so you'd need 32 bags — expensive at $6-10 each. For anything bigger than a single bed, order bulk soil delivery from a landscape supplier. A cubic yard (27 cubic feet) delivered runs $30-60 in most areas plus a small delivery fee.
Soil mix: the classic recipe is roughly:
- 60% good garden soil (or bulk topsoil, if you can verify quality)
- 30% compost (composted manure or leaf compost)
- 10% coarse material for drainage (sand, perlite, or vermiculite)
Fill the bed and water thoroughly. The soil will settle by 1-2 inches; top off before planting.
First-year planting
Don't try to grow everything at once your first year. A productive 4x8 bed for a beginner might hold:
- 2 tomato plants (one determinate, one indeterminate)
- 1 zucchini plant
- 4 pepper plants
- A row of bush beans (12-16 plants)
- Lettuce and spinach in the cool-weather months
- Herbs (basil, parsley, cilantro) at one end
This gives you a real harvest across the summer while leaving room to walk between plants. Overcrowding is the single most common first-year mistake.
Maintenance
Raised beds are low-maintenance but not zero-maintenance:
- Water more often than in-ground gardens — raised beds drain fast and dry out on hot summer days. Water deeply 3-5 times per week during peak summer.
- Top-dress with compost each spring — an inch or two of fresh compost on the surface, mixed gently into the top few inches of soil.
- Check the wood every 2-3 years — look for soft spots, cracks, or rot on the exterior corners. Small damage can be sistered with additional boards.
- Rotate crops — don't plant the same family (tomatoes, peppers, eggplant) in the same spot two years in a row.
Common beginner mistakes
- Building too big. A 6-foot-wide bed looks nice but you can't reach the middle without stepping in. Stick to 4 feet maximum.
- Cheap "topsoil." Bagged topsoil from big-box stores is often mostly ground bark with minimal actual soil. Pay more for a real garden soil mix.
- Skipping the compost. New soil in a raised bed needs organic matter to hold water and feed plants. Compost is not optional.
- Watering with a sprinkler. Raised beds dry out fast and want deep, slow watering. A soaker hose or drip line does better than sprinklers.
- Ignoring drainage. If your soil is heavy clay, add extra coarse material or the bed will stay soggy and stunt roots.
A single well-built 4x8 bed can produce hundreds of dollars of vegetables in its first year and continue producing for a decade. It's one of the highest-value DIY projects a homeowner can take on.
Frequently Asked Questions
Is pressure-treated wood safe for a vegetable garden?
How deep should a raised bed be?
Do I need a bottom on my raised bed?
What kind of soil do I fill a raised bed with?
How long will a cedar raised bed last?
About the author
Jane DIY
— Senior Reviews EditorJane has been renovating houses for 12 years and writes tool reviews you can actually act on. She currently owns and uses every drill in our roundups and does not accept manufacturer samples she cannot return.